
Roof leaks typically arise from aging or damaged shingles, failed flashing at chimneys, vents, or skylights, clogged gutters, poor attic ventilation, ice dams, and installation errors. Warning signs include brown ceiling stains, attic mustiness, lifted flashing, and grit in gutters. Prevention starts with routine inspections, cleaning gutters, repairing shingles and flashing promptly, improving attic insulation and balanced ventilation, and following manufacturer installation standards. Seasonal checks after storms help. The next sections outline causes, simple DIY checks, and when to hire a pro.
Key Takeaways
- Aging or damaged shingles (granule loss, curled/cracked/missing) expose the roof deck; replace compromised shingles and improve ventilation to extend life.
- Failed flashing at chimneys, vents, and skylights allows infiltration; inspect and re-seal or replace flashing, boots, and grommets regularly.
- Clogged gutters and downspouts back water under shingles; clean routinely, check hangers and seams, and ensure proper drainage after storms.
- Ice dams from poor attic insulation/ventilation cause back-ups; add insulation, balance ventilation, and safely remove edge snow with a roof rake.
- Poor installation (misaligned components, bad nailing, inadequate underlayment) creates leak paths; follow manufacturer specs and local codes, document compliance.
Common Signs You Have a Roof Leak

How can a homeowner tell when a roof is leaking? Clear indicators appear indoors and outdoors.
On ceilings or upper walls, irregular brown water stains often expand after storms. Paint may bubble or peel as moisture accumulates behind drywall.
In attics, damp insulation, darkened rafters, and musty odors signal active infiltration. Persistent moisture can trigger mold growth, visible as black or green spotting on wood, drywall, or around vents.
During rain, dripping sounds in soffits or light fixtures warrant immediate caution and power shutoff.
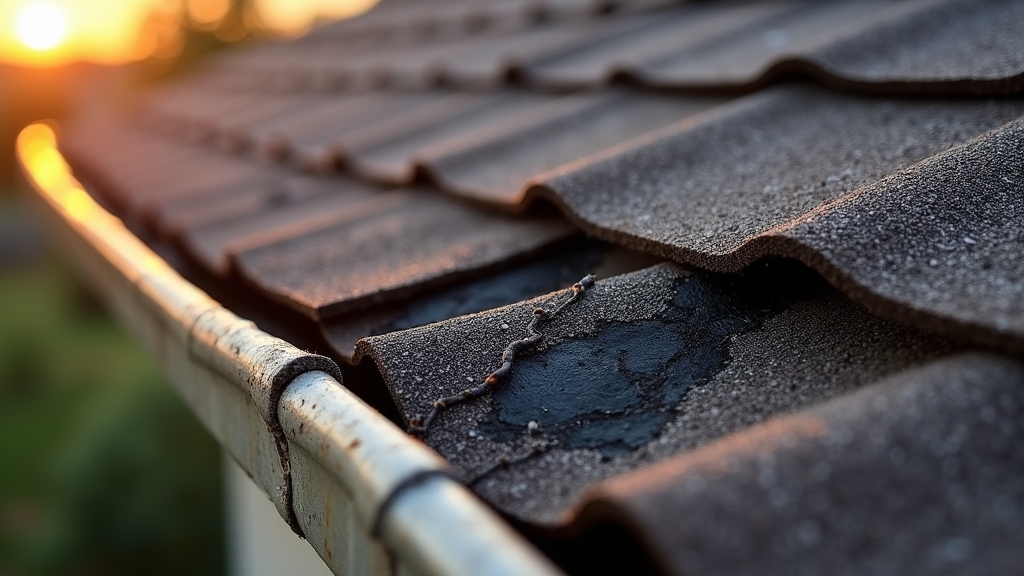
On the roof’s exterior, lifted flashing around chimneys, vents, or skylights can channel water inside. Blocked gutters that overflow down siding leave streaks and damp foundations.
After windy rain, wet spots along interior window heads also suggest roof-related intrusion.
How Aging Shingles Lead to Leaks
As shingles age, granule loss exposes the underlying asphalt mats to UV and weather, weakening their waterproofing.
Once brittle, shingles begin to curl, lifting edges that invite wind‑driven rain beneath.
Together, exposed mats and curled edges create direct pathways for leaks.
Granule Loss Exposes Mats
Aging asphalt shingles shed protective granules, leaving the underlying fiberglass or organic mat exposed to sun and rain. This granule deterioration weakens UV shielding, accelerates drying and embrittlement, and promotes cracks that channel water. As mats thin, capillary paths develop; small storms become leak risks. Mat exposure also invites algae staining that traps moisture, compounding decay. From the street, bare, darker patches signal lost protection and a shrinking margin of safety.
| Sign | Feeling |
| Dark bald spots | Vulnerability |
| Grit in gutters | Unease |
| Damp attic sheathing | Urgency |
Early interventions matter: clean debris to reduce abrasion, improve attic ventilation to limit thermal cycling, and seal minor surface defects with compatible coatings. When coverage loss becomes widespread, replace affected shingles or sections before underlayment and decking are compromised.
Curling Shingles Invite Water
Edges lift, corners twist, and tabs cup—subtle deformations that turn shingles into tiny scoops for wind‑driven rain. As asphalt ages, binders dry out, and repeated heating and cooling accelerate shingle deterioration. The curled edges break the seal strips, allowing gusts to pry at laps and drive moisture beneath courses.
Once lifted, capillary action channels water penetration along nail lines and into underlayment, wetting decking and insulation. Curling often concentrates at eaves, ridges, and south-facing slopes where solar load is highest.
Poor attic ventilation, inadequate intake or exhaust, and past ice dams intensify the curl by trapping heat and moisture. Prevention focuses on ventilation balancing, prompt replacement of failed sealant strips, and timely shingle replacement.
Inspect after storms; replace brittle, deformed shingles before leaks propagate.
The Role of Damaged or Missing Shingles
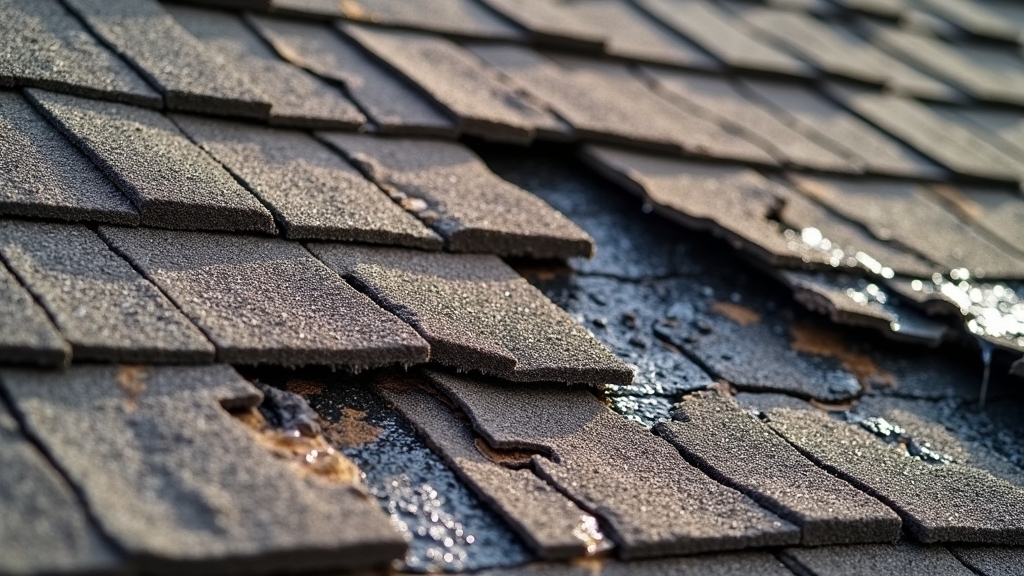
When shingles crack, curl, or go missing, they expose the roof deck to water infiltration and wind uplift, accelerating deterioration. Gaps allow rain to bypass the surface and saturate underlayment, leading to rot, mold, and stained ceilings. Loose edges also catch wind, tearing adjacent shingles and expanding the damaged area. Granule loss on aging shingle materials reduces UV protection, making the surface brittle and prone to further failure.
Early detection is essential. Look for color inconsistencies, lifted tabs, and soft spots underfoot. After storms, survey for displaced pieces in gutters or the yard.
Prompt repairs limit spread: secure minor lifts, replace isolated tabs, or consider broader replacement options when damage is widespread. Matching shingle materials and correct fasteners preserves weather shedding and warranty compliance.
Flashing Failures Around Chimneys and Vents
Few roof leaks are as deceptively destructive as failed flashing around chimneys and vents. When metal edges crack, corrode, or pull away, water follows the path of least resistance into attics and walls.
Freeze-thaw cycles, improper installation, and incompatible flashing materials often accelerate failure. Mortar joints at chimneys can also loosen, leaving gaps that channel moisture beneath shingles.
Prevention begins with routine chimney inspections and close review of vent boots. Technicians look for lifted edges, punctures, rust, and dried caulk.
Step flashing should interlace with each shingle course, and counterflashing should be embedded into the masonry, not merely surface-sealed.
Re-seal or replace deteriorated sections promptly, matching flashing materials to roof type and local climate. After storms or seismic movement, recheck seams to catch early leaks.
Clogged Gutters and Downspouts
Clogged gutters and downspouts often begin with accumulated leaves, shingle grit, and nesting debris that restrict water flow.
These blockages force water to back up under shingles, saturate fascia and soffits, and overflow near foundations, leading to leaks and structural damage.
The section outlines simple inspection routines, safe cleaning practices, and maintenance schedules to keep drainage clear.
How Blockages Start
Though gutters seem simple, blockages begin with small, overlooked inputs: leaves, twigs, seed pods, asphalt shingle granules, and windblown debris that settle in the troughs.
Over time, debris accumulation forms a mat that slows water, allowing finer grit to lodge and bind. Bird nests, pine needles, and roofing runoff add layers, narrowing flow paths toward the downspout.
When screens are absent or poorly fitted, material bypasses guards and collects at seams and hangers.
Sloped roofs shed granules heavily after storms, feeding the buildup. Moisture helps organic matter decompose into a silt-like paste that adheres to metal and vinyl surfaces.
The downspout elbow is a frequent choke point; once partially restricted, it traps more particles, turning slow drainage into blocked drains.
Regular inspection interrupts this cycle.
Damage They Cause
A single overflowing gutter can set off a chain of deterioration: water spills over the fascia, wicks behind siding, and seeps into eaves.
Trapped moisture swells wood, lifts paint, and invites rot, undermining structural integrity along rafter tails and soffits. Prolonged saturation can penetrate attic insulation, reducing its effectiveness and fostering mold colonies that spread to sheathing.
Ice formation in cold seasons widens seams and fastener holes, accelerating leaks. At ground level, concentrated discharge erodes soil, heaves walkways, and directs water toward foundations, stressing basement walls and slab edges.
Staining on exterior walls signals capillary movement within cladding layers. The financial impact compounds: localized repairs escalate to fascia replacement, siding remediation, attic mold treatment, and, in advanced cases, foundation crack stabilization.
Cleaning and Maintenance
Given how quickly gutter overflow can escalate into structural and moisture damage, routine cleaning and maintenance serve as the primary defense. A clear maintenance schedule helps homeowners prevent clogs that back water under shingles and into fascia, soffits, and walls.
Debris should be removed from gutters and downspouts at least twice a year, and more often beneath trees. Downspout elbows and extensions require inspection to confirm unobstructed flow away from the foundation.
During roof cleaning, care should be taken to avoid dislodging shingle granules or damaging sealants. Screens or gutter guards reduce debris, but they do not replace periodic checks.
Look for sagging hangers, failed seams, rust, and loose fasteners. After storms, verify that splash blocks, leader pipes, and outlets are intact and draining efficiently.
Skylight and Roof Penetration Issues
While skylights and roof penetrations bring light and utility to a home, they also create vulnerable points where water can infiltrate if details are mishandled. Most leaks stem from poor skylight installation, inadequate flashing, cracked sealant, or failed underlayment around any roof penetration such as vents, chimneys, and satellite mounts.
Water follows the path of least resistance, so even small gaps or fastener holes can channel moisture beneath shingles.
Even tiny gaps or nail holes can steer water under shingles along the easiest path.
Prevention relies on correct detailing. Step and counter-flashing should overlap properly, with continuous underlayment up-slope. Curbs must be squared, shims avoided, and manufacturer-specified fasteners used. Sealant is a supplement, not the primary defense.
Regular inspections should check for rusted flashing, loose storm collars, brittle gaskets, and debris that dams water. Promptly replace cracked glazing, grommets, and worn boots to maintain a watertight assembly.
Ice Dams and Winter Weather Damage
Ice dams form when heat escapes into the attic, melts roof snow, and refreezes at the eaves, trapping water behind the ridge of ice.
This trapped water can back up under shingles and leak into the structure, causing winter weather damage.
Preventive steps include improving attic insulation and ventilation, sealing air leaks, and maintaining safe snow and ice removal practices.
How Ice Dams Form
As temperatures swing around the freezing point, meltwater from a warmed roof refreezes at the colder eaves, creating a ridge of ice that traps subsequent runoff. This process begins with snow accumulation on the roof surface.
Heat escaping from the living space warms upper roof sections, causing localized melting beneath the snowpack. Meltwater flows downward until it reaches unheated edges, where ice formation occurs and builds a dam.
As the dam grows, pooled water backs up under shingles, exploiting tiny gaps or nail penetrations. Repeated thaw–freeze cycles enlarge the barrier and widen moisture pathways.
Variations in roof orientation, sun exposure, and insulation levels create uneven temperatures that accelerate this sequence. Valleys, overhangs, and gutters become focal points, concentrating runoff and increasing the likelihood of hidden seepage into decking and interior finishes.
Prevention and Maintenance
Understanding how ice dams form points directly to strategies that stop them: manage heat loss, control roof surface temperatures, and give meltwater a clear path off the roof.
Effective prevention begins in the attic. Seal air leaks around lights, hatches, and ducts; then add balanced insulation and ventilation to keep the roof deck uniformly cold. At the eaves, install ice and water shield membranes to contain backup.
Clean gutters and downspouts before freeze-thaw cycles, and keep valleys and roof edges clear of debris.
Plan seasonal roof inspections to identify loose shingles, failed flashing, or inadequate soffit vents. Establish maintenance schedules that include midwinter checks after heavy snow.
Use roof rakes to safely remove edge snow; avoid chopping ice. When needed, consult professionals for ventilation upgrades and targeted heat cable placement.
Ventilation and Attic Moisture Problems
Too little or too much attic ventilation often drives hidden moisture problems that lead to roof leaks. When warm, humid indoor air reaches a cold roof deck, it condenses, wetting insulation, decking, and fasteners. Over time, this promotes rot, mold, and shingle deterioration, even without visible exterior damage.
Balanced attic ventilation supports moisture control by moving humid air out while drawing in drier air. The goal is continuous airflow from soffit intakes to ridge exhausts, avoiding short-circuiting vents or isolated fans.
Adequate insulation and sealed ceiling penetrations reduce vapor movement into the attic. In cold climates, vapor retarders and air sealing matter; in warm, humid zones, reducing attic heat and humidity is vital.
Regularly monitor humidity, check for frost, damp insulation, or rusted nails, and correct imbalances promptly.
Poor Installation and Workmanship Errors
Few factors undermine a roof’s longevity more quickly than poor installation and workmanship errors.
When shingles, underlayment, or flashing are misaligned or inadequately fastened, water pathways open at seams, valleys, and penetrations. Incorrect nail placement, overdriven fasteners, and cut corners at roof junctions often produce early leaks that expand under wind and thermal stress.
Sound installation techniques follow manufacturer specifications and local codes, ensuring correct fastener type, pattern, and depth.
Follow manufacturer specs and local codes to ensure correct fastener type, pattern, and depth.
Proper flashing at chimneys, skylights, and walls, along with sealed underlayment, creates layered defenses that shed water predictably.
Adherence to workmanship standards includes substrate preparation, straight courses, and precise detailing at edges and penetrations.
Verification through documentation, photos, and compliance checks helps confirm that the roof system was installed to perform as designed.
Seasonal Maintenance and DIY Inspection Tips
While roofs are built to withstand weather, seasonal checks catch small issues before they escalate into leaks. A practical routine starts with spring and fall walkarounds from the ground, noting missing shingles, sagging gutters, and debris in valleys.
Seasonal checklists help homeowners stay consistent: clear leaves, confirm downspout flow, and verify attic ventilation. In winter, monitor ice dams and remove snow loads safely from the edge. In summer, look for blistered shingles and sun-brittled sealant.
DIY tools keep inspections efficient: binoculars for distant views, a sturdy ladder for careful edge checks, gloves, a gutter scoop, a hose for controlled water tests, and a flashlight for attic scans.
Inside, they observe stains, damp insulation, and daylight at penetrations, then document findings for tracking.
When to Call a Roofing Professional
When signs point beyond routine upkeep, a roofing professional should be engaged to prevent structural damage and costly escalation. Persistent leaks after DIY fixes, widespread shingle loss, sagging decking, moldy attic odors, or water stains near chimneys and valleys indicate issues requiring trained assessment.
A professional can trace hidden pathways, document conditions for roofing warranties, and recommend targeted or full-system solutions. Calling early limits interior damage and reduces overall costs.
Urgent situations—active dripping, storm punctures, tree impact, or exposed underlayment—warrant emergency repairs to stabilize the home before thorough work proceeds.
Licensed roofers also verify ventilation, flashing integrity, and substrate health, areas often missed by homeowners. They supply written estimates, timelines, and materials options, ensuring repairs meet code, maintain warranties, and restore weatherproof performance.
Frequently Asked Questions
Does My Homeowners Insurance Cover Roof Leak Repairs or Water Damage?
Yes, homeowners insurance may cover roof leak repairs or water damage if sudden and accidental, subject to coverage limits. Exclusions often include wear and neglect. They should review their policy, document damage, and follow the insurer’s claim process promptly.
How Do Roof Warranties Handle Leak-Related Issues and Exclusions?
Roof warranties generally cover manufacturer defects and approved installation errors, but include strict leak exclusions for wear, weather events, neglected maintenance, and unauthorized repairs. Warranty coverage often requires documented upkeep, prompt leak reporting, and using certified contractors for diagnosis and remediation.
What Roof Materials Are Most Leak-Resistant in My Climate?
In most climates, metal and high-quality tile rank as most leak-resistant. Metal roofing advantages include minimal seams and rapid shedding. Tile roofing durability excels with proper underlayment. In freeze-thaw or hurricane zones, certified installation and flashing details remain critical.
Are Solar Panels Likely to Increase Roof Leak Risks?
Yes, if poorly executed. Solar panel installation can introduce penetration points, but proper flashing, certified installers, and routine roof maintenance minimize risks. Strong underlayment, compatible mounting systems, and post-install inspections help guarantee long-term watertight performance and manufacturer warranty compliance.
How Much Does Professional Leak Detection Typically Cost?
Professional leak detection typically costs $150–$600, averaging around $300. Cost factors include roof size, complexity, access, materials, and urgency. Professional services provide precise diagnostics, while DIY alternatives—like hose tests or infrared cameras—may help but risk missed issues and damage.
Final Thoughts
Preventing roof leaks is all about vigilance and speed. Seasonal roof inspections, clean gutters and downspouts, and prompt repairs to shingles and flashing stop small issues from turning into stained ceilings, wet insulation, and mold. Balance attic insulation and ventilation to curb ice dams and condensation, and follow manufacturer specs to avoid installation-related leak paths. After storms, do a quick check and address lifted flashing, missing tabs, and clogged outlets before water finds a way inside. If damage is widespread—or you’re unsure where the leak begins—bring in a pro to diagnose and fix it right the first time via our full services for residential and commercial roofs; if replacement is the prudent path, explore options here: roof replacement.
Need help now? Schedule a professional roof inspection or request a leak repair/ roof replacement estimate with Troy Roofing Pros. Visit our contact page to get a fast, no-obligation quote and next-day scheduling.